Engine Builds for Dummies! Part 1
...
If you're anything like me, you know what it's like to be told that you can't do something. Crap, we all know what that's like...and it feels like crap.
You can't have that nice car-- it's too expensive. You can't modify said nice car, it's not practical. If you get a motor how will you pick it up? How will you take it apart? Are you just going to sit in a freezing cold garage with a bunch of coats on and a breaker bar loosening 12-point head bolts from a hunk of metal?
Precisely..I will do precisely all of those things.
Well folks, the truth is if you have the determination to do something, whether it be small or large, then you can do it. And although this article shows the partial disassembly and inspection of a motor-- something that people do every day that really is nothing special in itself, it also shows the beginning of a journey for me. This is yet another step on the way to show those people who said I couldn't do it that I can.
1.) To learn-- this is my first motor "build."
2.) To build a reliable motor capable of around 250 whp or more.
3.) To save money without seriously cutting corners
4.) Again, to learn because this is my first motor "build."
If you, the reader, have anything to contribute so that I may learn more, then I encourage you to come forth...even if you're proving me wrong-- I'd rather be right in the end with the help of you!
Starting with my piece of ish engine stand and my beautifully mummified, incomplete long block I began the assembly of my stand first.
Voila..
With the engine chilling on the stand I held the crank still on the pulley end and I used a 1/2" ratchet with a cheater bar to remove the flex plate bolts on the transmission side. Note this engine was pulled from an automatic CRV.
Here's the ratchet with the cheater bar on the transmission side that I used to remove the flex plate bolts:
As you can see, the flex plate bolts are to be removed by a 12-point socket. This one is a 17 mm:
After loosening the bolts in a star pattern, remove them by hand so that you can take the flex plate off.
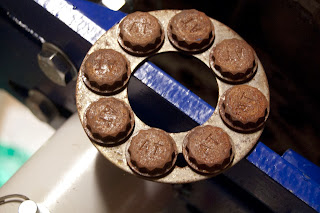
Here is what the washer for the flex plate looks like with all of the bolts sitting snug:
Here's the rusty flex plate:
A clean rear main:
Next I removed the crank pulley. I didn't have the special Honda tool needed for this and I don't have a torque wrench here in Wisconsin, so when I got here I actually stopped. However, because I'm so nice I'll keep going :)
As I mentioned before, this is partially a budget build. Where I can save I will save. Since I couldn't save by buying a brand new torque wrench, I began looking for the Honda Crank Pulley Removal Tool. After searching the internet and scrounging the forums I finally found the golden grail!
Yes, freaking O'Reilly Auto Parts has this crazy Japanese weirdo tool for rental! Anyway, here's the final lineup of tools I used to remove this stupid circle:
I paid about 30 bucks for all of these tools excluding the rented Honda tool.
And here's the cheater bar and the breaker bar that I used IN CONJUNCTION to break this sucker free.
Size of pipe:
And of course...we can't forget the magic "Liquid Wrench."
Using my new found supplies I took the ratchet and attached it to the Honda Crank Tool, and then I put the cheater bar on the end of my ratchet. I placed the crank tool in the crank pulley, then I set the socket to the right motion and let the end of the cheater bar sit against the ground to provide resistance.
Then I took the breaker bar, and put a cheater bar on the breaker bar and I DID IT! :D One of the best feelings in the world is getting these hat crank pulleys off if you know anything about them. I HATE THEM >:0
:)
If you're storing your parts in a bin and you're afraid of losing things, then pay attention here. This block that I have circled inside of the crank pulley is called a woodruff key. It mates with a notch in the crankshaft so that the pulley may spin with the bottom end. Check it out.
Timing chain cover in the RAW.

And here's a sneak peak of what's to come ;)


No comments:
Post a Comment
Comment