Friday, January 31, 2014

Project DC5: Engine Builds for Dummies! Part 4


Engine Builds for Dummies...Part 4

_________________________


_________________________

Sup guys.  So last time you read this you saw that I had finally gotten to the bottom end of this big assortment of Lego blocks that Honda guys like to call an engine!  Well, today we're going to look at the removal of the cylinder head and the girdle so that we can get a look at the condition of the block, crank, and cylinder walls.  The condition of the head is not important because it is not a true VTEC head.

There are ways to get the CRV head to work with VTEC killer cams and have only two roller-rockers work actively on a set of cams, but I prefer not to go this route since I want to daily drive this thing.  The pistons are also not important because they are only 9.6:1 in compression and they are also cast, not forged, from the factory.  I am doing an all motor setup, so my goals are to have small piston to wall clearances with high compression.

To accomplish this I am currently considering a 2618 alloy piston in 88 mm bore with somewhere from 11.0:1 compression to 12.5:1 compression depending on what tuner I go to.


Anyway, enough of the mumbo jumbo.  Let's start unbolting things, shall we?

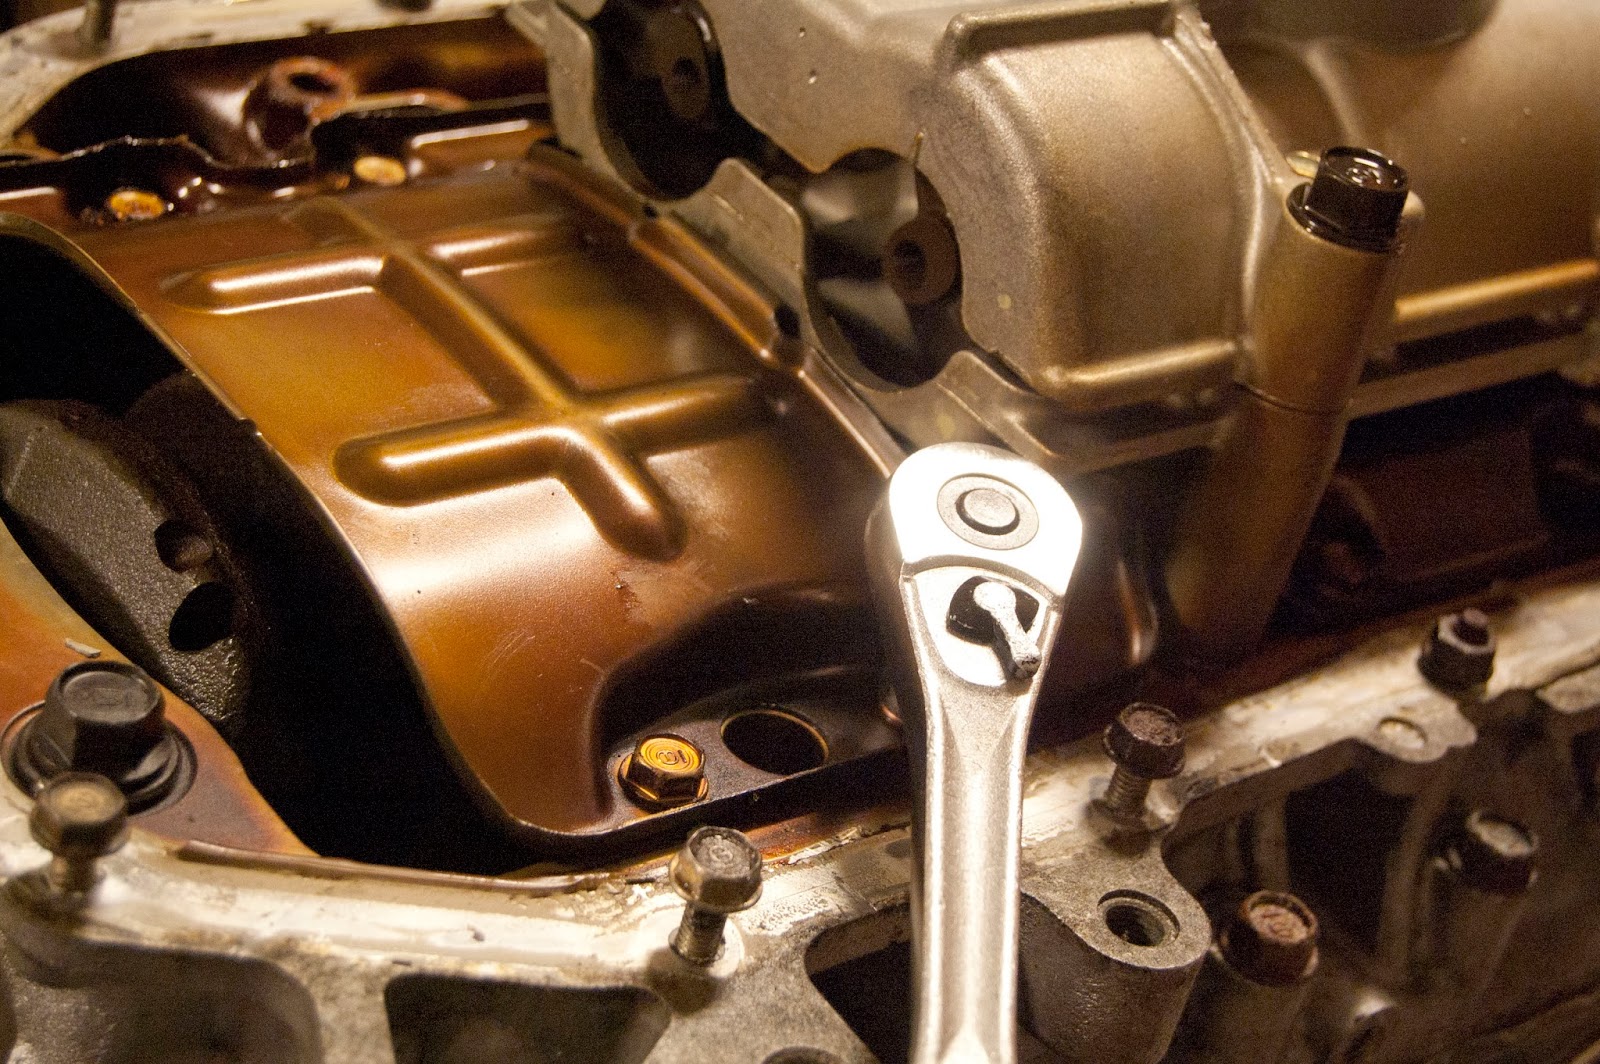
The sequence for unbolting the K24A1 head from the block is as follows:

Taking a 12-point metric socket of the appropriate size and a breaker bar, loosen each of the bolts by 1/3 of a full rotation in the above order.

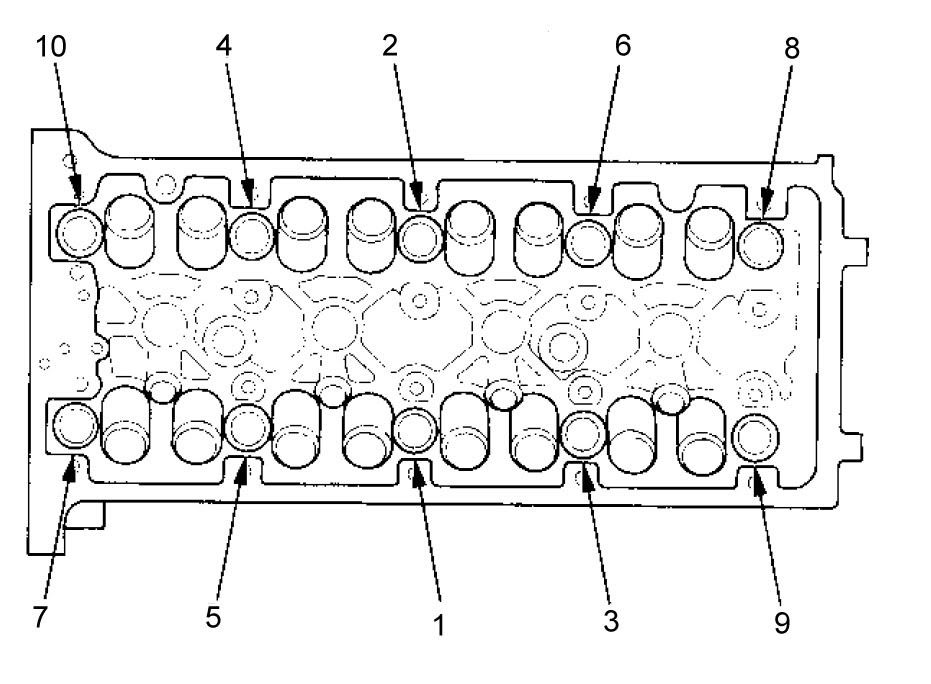
After doing so, once more loosen them by 1/3 of a full rotation.  This isn't absolutely necessary, but I wanted to ensure that I was completely preventing any warpage of the cylinder head.


After loosening the bolts on the cylinder head, take the cylinder head off of the block.  I just pulled mine and it came off.  You shouldn't need any force to remove this.  Here are some shots of the pistons once I removed the head:


Looking at all of the pistons, nothing looked unusual.  No pitting in the tops of the pistons leading one to believe that detonation was occurring.  The valve reliefs looked uniform on each piston dome, so looks like no piston to valve contact.  We will also check that out when we look at the underside of the head.  Keep in mind though that it really doesn't matter as I am not reusing these pistons or this head.

However, this all gives me a pretty good idea about the condition of the motor.


After looking at the cylinders, I flipped the head over and checked out the domes and the valves.  These looked really good.  Better than the head that I have waiting to go on this motor ;)


Taking the engine and flipping it over I started loosening the bolts on the outer part of the girdle in the following order:


You'll find some of these bolts here:


After removing those bolts, I wanted to remove the main bolts on the girdle.


So, that's what I did.


For the sake of being organized, I numbered the main bolts with a pink paint marker and then drew a diagram on a sandwich bag which I then stored them in.


Take out your main bolts, grab yourself a dead-blow hammer, and lightly tap at the sides of the girdle on all sides of the engine until it loosens from the dowel pins on the block.


Here are the crank journals in the girdle.  The bearings looked in REALLY good condition when I pulled this whole thing apart.  Definitely made me happy to see that nothing was seriously wrong here.  


After taking off the girdle, I really started to see the true condition of the motor.  You'll see what I mean soon.  Check out these pictures of the crank journals.  They looked immaculate!


Since I didn't have a 10 mm 12-point socket for a ratchet, I used regular box wrench to take the con-rods off of the crank.  Let's take a look at the process, shall we?  It's rather simple.

First I loosened both sides of the con-rod:


And then I labeled the bolts and the con-rod bottom halves according to their location in the engine, then removed them.


Here's the top half of the con-rod.  It's still sitting on the con-rod journal.  Look how good this journal looks.  The crank is very shiny, there's no pitting or scouring that I can see.  Many of these journals looked exactly like this.  I was also very excited to see this!

For this part, some take the wooden end of a hammer and tap the top end of the con-rod out by making contact with the bottom of the piston.  I forget what others use...I just used my hands.


And here's the piston removed from the engine.


That's about it for this installment of "Engine Builds for Dummies!"

In the next installment I'll go over inspecting the block with some blueprinting tools and the results that I find :).  Thanks for kicking it with me guys.


Until next time....Lexi.Laron...out...


Tuesday, January 21, 2014

Project DC5: Engine Builds for Dummies! Part 3


Welcome one, welcome all, back to another edition of "Engine Building for Dummies!"  If you missed any of my previous articles on Project DC5, go ahead and click the links below:


You know, it's tough-- being away from home.  It's humbling.

Being alone allows for time to realize one's faults.  Without family or friends as close as the ones back home to confide in it is possible for one to gain some serious insight into one's self.

You begin to see your faults, you begin to see your negative thoughts, you begin to see how all of those things affect you.

In a way, being away from home makes you more self-aware, in my opinion.  That's one of the things I've learned while out here-- that when you're alone, you have more time for introspection.  You have more time to think.  Sometimes it's good, but for the most part it's been pretty bad for me lately.  I miss my family.

Me by Lake Michigan in Chicago

However, I always remind myself of the positive outcomes of this event in my life.  For example, I am much more technically skilled now, especially in my career of chemical engineering.

For the most part, I have become an avid forum reader.  I frequent K20A.org every day to learn more about the K motor and what it is capable of, how to build one, what parts to use, what precautions to take, who to trust, who to talk to.  The journey of this motor build so far has been a journey in itself.


And I have learned so much more than all of these things.  I have learned how to gracefully handle myself around those more intelligent and wise than myself.  I have learned to shut my mouth when I need to and how to speak when I have to.  I have reaffirmed my belief that listening is more important than anything.  Because without listening, you can't learn.

This engine build somewhat embodies all of these learnings.  And so I am glad that I can share it with you, my readers on this blog...

Over the weekend, I had a lot of fun.  On Saturday night I went ice skating for the first time in a while.  I missed ice skating.  It reminded me of the days that I used to play ice hockey; doing cross-overs while turning, skating backwards like I was in the crease again, playing goalie, zooming down the ice like I was rushing to the bench or as if I were on a breakaway.  It made me wonder if I want to get back into hockey some day.  Maybe some day.

I also went snowboarding with my roommate.

We went to Cascade Mountain in Wisconsin, an attraction rated four stars on Google.  Although the slopes were a bit icy, we both shredded mad hard, tearing up the green circles, then the blue squares, and eventually the black diamonds.  This was my first time on the black diamond!  It was also my first time catching air off of a couple of jumps while snowboarding.  I couldn't have had more fun!

However now it's back to the work week and back to more engine building.  And I really can't complain about either.  My job is dope and this engine has been going slowly and smoothly.  I guess I just get down sometimes and I can't really help it.

If you remember in my last edition of "Engine Builds for Dummies" I finished removing the timing chain cover, and the tensioners along with the oil pan.

Well, here's the bottom end uncovered!  On top of the girdle sits some half baffles, or abbreviated windage trays that prevent oil from getting picked up into the rotating assembly, and a bulky K24A1 oil pump with heavy balance shafts included.


In theory, if the engine did experience some damage which made some metal shavings appear, then they would have appeared in the oil pan.  They would have also been apparent in the oil when I drained it.  However since there was little to no oil to drain from this motor, I figured another good place to check for large debris of any sort would be in the mesh inside of the oil pickup on the pump.  

Let's take a look at the clean pickup's mesh:


Next I removed the abbreviated windage tray.


 Finally, after removing the top four bolts on the back half of the abbreviated windage tray, you will see your first piece of crankshaft counterweight!  What a beauty!!!  Hahah


After I took off the half baffle, I began my work on the oil pump.  For starters, you're going to want to remove your tensioner.

I plan on switching to a K20A2 oil pump which has no balance shafts.  This will provide less rotating mass which will allow me to rev higher than on a K24A1 oil pump without cavitating the pump.  A couple of things are needed for this upgrade, including:

  • A 64-link Acura RSX Type-S oil pump chain (PN: 13441-PCX-004)
  • An RSX Type-S oil pump chain guide (PN: 13460-PNC-004)
  • A sealing bolt and washer to plug a hole in the girdle which would have supplied the K24A1 oil pump's balance shaft assembly if it were still bolted to the engine (PN: 90004-PE2-005 and 90401-PE2-003)
  • Bolts for the oil pump (PN: 95701-06025-08 and 95701-08050-08 and 95701-08075-08)
  • And the pump itself, of course (PN: 15100-PRB-A01)
Notice that the K20A2 tensioner is not needed for this mod because the K24 one will suffice.  That is why I will be saving this tensioner.  That's a good 60 dollars in my pocket :)


Here's the removed oil pump chain tensioner with its bolts.  I later put this in a bag with its bolts to make sure I didn't lose it.


Next I took an allen key and a cheater bar (a large copper pipe, lolz) and removed the K24 oil pump chain guide.  Supposedly this guide is too long to work with the K20A2 oil pump chain and oil pump assembly.  To fix this, an RSX Type-S oil pump guide will be needed.  Its part number is listed above.


Here is a pic of the tensioner on the left with its three hex bolts and the guide on the right with its two oddly shaped allen bolts:


I can't remember, but I believe there are four bolts holding the K24A1 oil pump onto the bottom end of this motor.  Proceed to remove the pump after you have removed all of the stuff holding it on...like the tensioner, guide, chain, sprocket, etc.


Looking at the pump, you can see the balance shafts.  They're just counter-weighted shafts that spin with the pump to offset vibrations.  Supposedly they're better for daily drivers, but honestly, most people don't think they make a huge difference.  So this is another reason why I care not for the K24 oil pump.


 After you've removed the pump, then you should be seeing something like this:


 ;)

Thanks for reading guys.  Until next time, you will just have to wait and see what the condition of the rest of this motor is in!

Peace.