Showing posts with label k20a2. Show all posts

Monday, April 13, 2015

Philly SCCA's Summer Series Rust-Off; Dialing in the DC5

Hey all!  Welcome back to Lexi.Laron!

If this is your first time here, then just "welcome," period!

The other day I took part in an autocross event known as the Summer Series Rust-Off.


Every year, the Philadelphia Region of the Sports Car Club of America hosts its "Rust-Off" so that members can dial their cars in that they've been working on over the winter.  This allows us to prepare for the upcoming points season so that our cars are working to our limits, and not the other way around.


With a long day ahead of us, my friends Anthony and Alex rolled up in their silver and blue miatas, respectively.  Alex just finished building his Miata that he calls #TougeTurbo for track use.

Alex is running some insanely wide Rota Grids with Hankook Ventus RS3 Version 2's for the street and some flow-formed Jongbloed Racing Wheels wrapped in Maxxis RC-1's for auto-x and track use.  Protection for Alex is provided by a full Spec Miata bolt-in cage, six-point RaceQuip Harness, and Sparco Sprint V for extra bolstering.  He is running Tein Sport Coilovers, NA8 brakes and blank rotors, and energy suspension bushings in every possible location.

Those are just some of his upgrades and he is currently in the process of saving up for a turbo kit.  Go check him out on Instagram at @MX5Militia.

(From left to right) Alex's car, my car, and Anthony's car

 The lighting was less than optimal for my phone camera.

Again, poor lighting.

With Alex off to a cruise, it was just Anthony, me, and some friends from the 282 Touge Crew.

We walked the course and started prepping the cars for a day filled with many, many, many runs.  I ended up getting 19 runs in total which is way more than an average Northeast Autocross.  Keep in mind, I started racing in the Midwest where the population density is much lower.

After walking the course and going through tech, I began to dial the car in.  With no sway bar at my last event I was spinning out like crazy.  On exit ramps and other long sweeping corners, my car had more grip than ever with a crappy alignment, however without the sway bar, fast direction changes proved difficult.  Autocross and track are very different-- keep that in mind.  You can see how bad I did at my last event in Hershey in the video below:

Hershey PA Autocross with Susquehanna SCCA

For this event, my stock sway bar was back on with new end links and new tie-rod ends.  I also bled my brake system properly and checked my Hawk HP Plus pad life.  For my next track day I will be replenishing my HP Plus's with new HP Plus's!


With all of that in mind, I'll share with you some of the tuning steps that I went through during my first heat.  My GoPro died for the second heat, so I can't do much for you guys there, except tell you that it went really well!  

The settings for all tire pressures are in cold PSI if stated as an actual number (e.g. tire pressure was 30 PSI).  If the tire pressures are stated in differences (e.g. 1 less PSI in front tires) then I changed the tire pressures while the tires were hot.

The settings for my first run were as follows:
  • Full soft damping rate in front with full stiff in rear
  • Tire pressures:
    • Rear tires-- 29 PSI
    • Front Tires-- 30 PSI
The tire pressures gave me no sidewall scrub in the previous event that I ran in Hershey, PA.

After the first run, I noticed that the car was rather unpredictable in direction changes.  I was getting a lot of snap oversteer when transitioning from the first slalom to the next.  As a result, I decided to stiffen up my damping rate in the front by five clicks.  Keep in mind the Tein Street Flex has 24 "clicks" of adjustability.

Run 2 went much better.  The oversteer I received in transitions was much more predictable.  The settings for this run were as follows:
  • Five clicks from full soft in front for damping rates
  • Tire pressures same
For Run 3 I went with the same settings as for Run 2, but I noticed that on the long sweeper in the back I was getting substantial understeer.  As a result I decided to lower my front tire pressures by one PSI for Run 4.

Run 4:
  • 1 PSI less in front tires
  • Same damping settings
If you're an experienced auto crosser, you know that sidewall scrub is bad.  This occurs when the tire rolls onto its outer edge during cornering.  This is bad because you lose contact patch.

Notice how the front passenger side tire is almost on its edge as this Audi corners

To determine if you are scrubbing, there is a technique that most autocrossers use known as "chalking the tires."  What you have to do is take a piece of chalk and color the side of the tire with the arrow shown below:


If you are just on the arrow, you know you are using the tire to its full potential and your tire pressures are set correctly.  However, if you are riding on this arrow, you are losing grip due to sidewall scrub in most cases.  Of course, there are other variables, but this is an all-else-equal approach to sidewall scrub, contact patch, and maintaining grip.

During Run 4, I noticed that I was not using all of my rear tires thanks to this tire chalking technique.  So, I let out one PSI in the rear tires for my fifth run.

Run 5:
  • Same damping rates
  • 1 less PSI in rear tires
Run 6, 7, and 8 all utilized the same settings as Run 5.  During these runs I was trying to push my car as hard as possible.  I got a feel for the cars limits and by Run 9 I was able to more gently modulate my throttle during the slaloms, transitions, and sweepers.  

Look at it in the video to verify my improvement.

The last run of the first heat was Run 10.  During Run 9 I noticed that I was still getting a lot of understeer on the "turnaround" in the middle of the course.  I know now that I need more front camber because I am currently running with no alignment.  

Also I am losing grip when my front end is compressing.  This implies that I am losing contact patch in the front of my car upon compression thanks to the wonders of macpherson strut suspension geometry.  

Take a look for yourself and READ the caption!

Taken from Sport Compact Car

So, even though letting out more air in the front would result in more sidewall scrub (I was already on top of the arrow) I decided to let out more air pressure up front for my final run.  It helped me to corner at the turnaround, but again, I was losing contact patch due to sidewall scrub.

Run 10:
  • One less PSI in front
  • Same suspension settings
Here's a video of all of the runs from my first heat:


During the second heat I marked my fastest time of 29.288 seconds on the course with no cones.  I beat a couple of really good cars (mainly AWD and RWD) with good drivers and good tires (most had Direzza ZII Star Specs).

Fastest Run:
  • Suspension five clicks from soft in front, full stiff in rear
  • Front tire pressure: 34 PSI
  • Rear tire pressure: 28 PSI
Keep in mind that these tires are better than the Bridgestone Potenza S-04 Pole Positions that I am running.  Once I get my camber dialed in to be negative in the front, slightly negative in the rear, and my toe to be at zero degrees all around, I believe I will be poised to be much faster in future runs!

Thanks for reading guys!

Saturday, December 27, 2014

DIY A/C Delete on 2006 Acura RSX Type-S

Hey readers!

How are you all?  It has been a while yet again.  And while that is a common theme in almost every post-- that I am a slacker-- I still come back to write over and over again because it's something I love to do in my spare time.

Currently I am on break from school.  I am in my senior year as an engineering student and while I cannot wait to graduate and make money at a job for cawr pawrts, I have also been having the time of my life!

So much has changed...some for the better and some for the worst.  But I have grown a lot as a result.
_________________________________________________

Anyway, enough of the sappy stuff.  Let's get down to the nitty gritty!

Since I do not have a job I am pretty low on money.  This is not a big deal, but it has cut into my plans for next season pretty seriously.  My goals were to get hasport motor mounts, swift springs, and a racing seat for the car with other possibilities including a high flow cat to get me back into STX class, vents for my hood, and possibly a steering wheel.

Momo Start Bucket Seat (FIA Approved), Personal Neo Grinta 330 mm, Swift Springs, HASport Motor Mounts

Long story short I've been going nuts not being able to modify this thing!  All I can do is practice driving on driving simulators and that's just not the real thing.

My Brother Playing GT6 with my Logitech Force Feedback Wheel on my Parents' 50" Flat Screen

I had been thinking recently about ways to save weight.  One thing I did was I deleted my rear windshield wiper, but I'm sure that only netted me four pounds at most.  I wanted something more.  I was fiending.

So, I decided to delete my A/C.  After all, I never used it and I was pretty sure that it needed a recharge anyway.  So instead of giving it some more refrigerant I just removed it all together.  Recharge for what?

Other reasons for removing A/C include:
  • Decreasing the rolling drag on the serpentine belt that runs off of the crank, thus slightly improving power and mpg
  • Removal of the A/C condenser which sits directly in front of the radiator therefore making more space for an intercooler if I ever wanted to boost the car
  • Increased air flow to the radiator therefore reducing the chances of overheating on track
With all of that being said, the only thing I'd really be giving up is comfort and possibly it may make my tune function differently.  So, let's begin!


You're going to want to start by removing the power steering reservoir with a 10 mm ratchet.  This will allow you access to the 12 mm (?) bolt that sits on the idler pulley.  Put a long serpentine belt with a socket over this idler pulley's bolt and pull it toward you to break the tension in the belt.  Then, remove the belt off of the top pulley (the power steering pump's pulley).


Look closely at the bottom-right of this picture.  A hard line for the A/C sits here and connects to the condenser.  A second line like this is on the left side of the condenser.  After safely (and legally) removing the refrigerant from your system, pop the bolts off of these hard lines and pull them away from the condenser.


Next, unbolt the power steering coil which sits in front of the condenser.  This coil probably serves as a mini-me heat exchanger to prevent the power steering fluid from overheating.  Notice there's not much more to the cooling duties of the P/S fluid than this.


On the right and left of the condenser, you will find these brackets that hold it to the radiator support.  Unbolt the condenser on both sides with some sort of wrench that gives you easy access behind the headlights.  I used this swivel thing with a 10 mm socket.


The picture above shows the condenser removed.. Looks pretty beat up.  You can tell that the bottom part is where the bumper opens up to allow air to flow through because there's all sorts of crap in there.

If you take a look at the next picture you'll get an idea for how much space this frees up.  For all of you guys who track, you know that when your car has overheating problems that providing more airflow (either through venting or through ducting or whatever) is one solution.  I don't think the DC5 has cooling problems, but a little added reassurance is never a bad thing.

Plus I like to rationalize over negligible changes on my car because I'm a nerd :)


The next thing I did was remove the radiator mounting brackets and the radiator cap.  To remove the compressor, it is easier to remove everything sitting in front of the engine.  It's all due to a single bolt which sits right above the subframe.  Talk about a pain.


The coolant was changed when I first bought the car...about three years ago.  I was worried that it'd come out looking like crap since I have had a bunch of auto-x days and parade laps at Pocono on this motor.  However the fluid didn't even look that bad!  It was clear and not viscous.


To be absolutely sure that I wasn't killing my engine all of this time, I took out a coolant test tool to look at the boil-over and freeze protection of this fluid.  

The following picture shows the boil-over protection of the fluid.  The recommended boiling point of the fluid is 129 degrees Celsius according to this little gauge.  Mine was slightly compromised at 128 degrees Celsius, but I feel that maybe if the fluid filled up the little gauge more, the needle inside would have risen more.  Not too shabby!


Next I checked the freeze protection of the coolant.  The picture below shows a recommended -37 degrees Celsius freezing point and an actual freezing point of -29 degrees Celsius.  Again, more fluid in the little plastic part may have helped, but this is okay for me...good thing I will be flushing the coolant and replacing later anyway.


Next there are four painful connectors connected to a painful harness which is fastened in a painful manner to the radiator fan and to the bulkhead.  Remove those.


You'll notice in this last picture that I had already removed the clamp from the lower radiator hose.  I also removed the lower radiator hose before taking these clips out.  Big mistake.  My hair smelled like coolant all night.


Remove your upper radiator hose, and your radiator is essentially free!  You may want to not only remove the passenger side headlight to remove the radiator, however.  You may want to remove the driver's side as well.  This will give your ratchet access to the crash bar's bolts that hold it to the frame rails.


With the radiator removed your front end will look much like this.  Remember, I really do recommend you remove this crash bar AND your headlights BEFORE taking the radiator out.  This was my first time doing this and the order in which I did things was a little wacky.


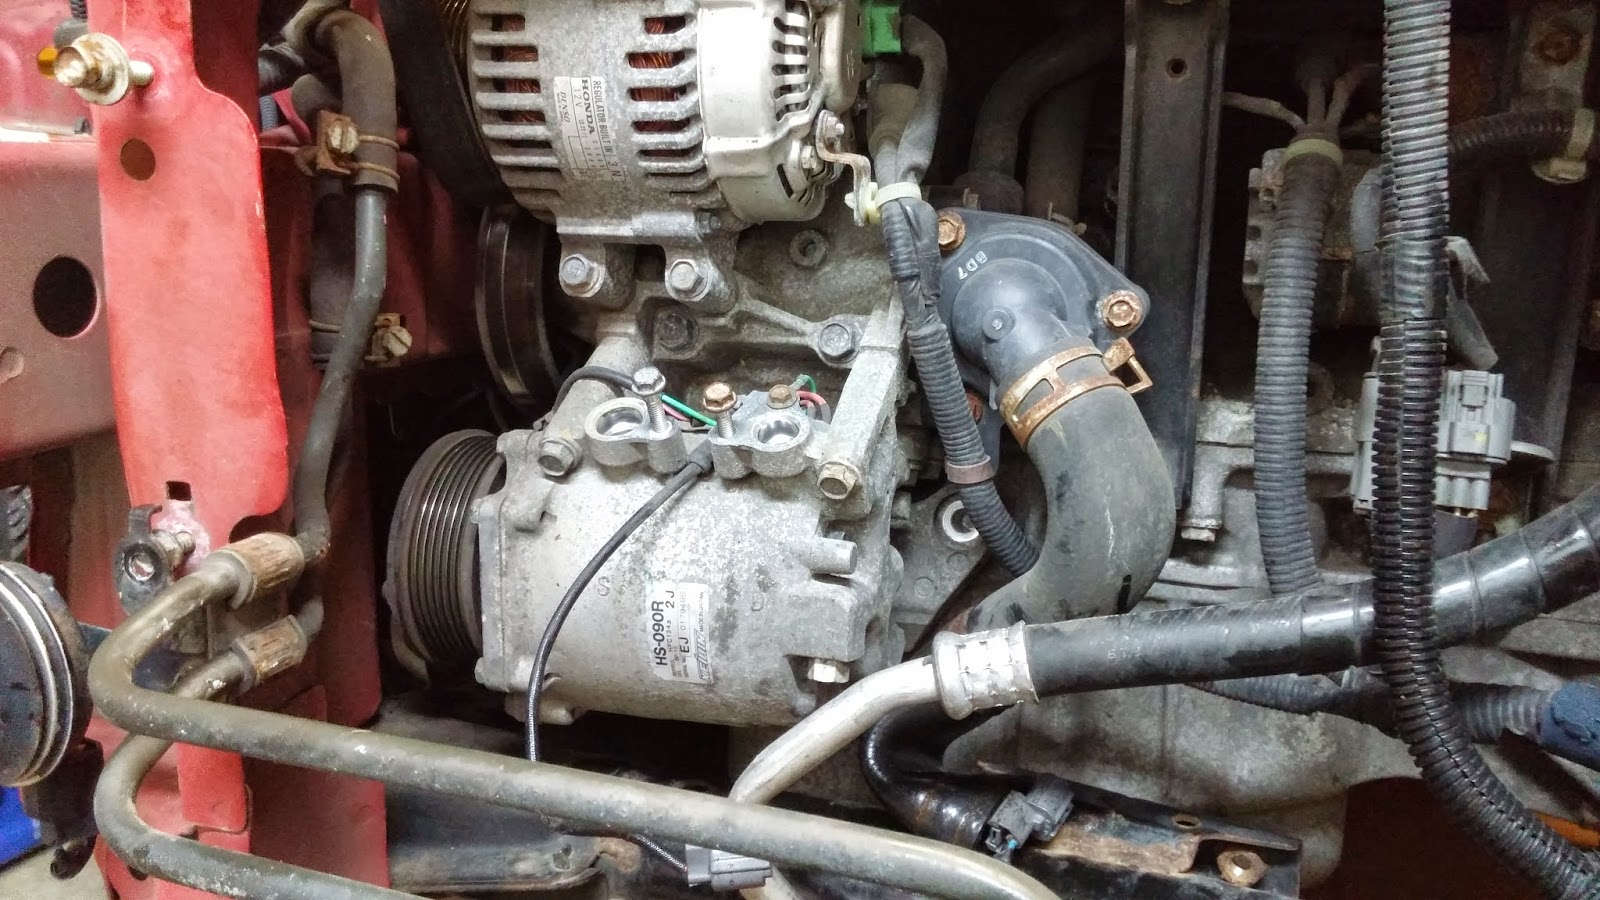
After removing the crash bar you'll have a ton of access to that A/C compressor at the bottom-left hand side of the picture.


There is an inlet to the compressor and an outlet.  I'm not sure if the fluid entering the compressor is gaseous or if it's liquid.  I'm not too keen on the specifics of A/C operation, but I know the outlet is "compressed" A.K.A. at a higher pressure than the inlet.  This compressed fluid is then cooled in the condenser.


Next I removed the bolts holding the compressor to the bracket.


Try to compare this picture to the first close-up of the compressor.  You'll notice two of the bolts holding the compressor to the block are removed.  Remove these!


There is one last annoying bolt which is sitting RIGHT ABOVE THE SUBFRAME on this car.  This is the whole reason why you are disassembling your whole car.  Thanks Honda.


When you take your compressor off of the motor, you'll see a bracket that was holding the bottom of the compressor to the block.  In this picture it is removed, but you will want to remove that bracket as well since it serves no purpose now.


There's some sort of sensor that goes into the evaporator.  I'm guessing it's a temperature sensing element.  Remove the clip that goes to this sensor first.


Now, unbolt the whole canister from the car along with the bracket that's holding it.  Most pieces of this system are very light aside from the compressor.  You'll notice that this canister is especially light despite the way it looks (heavy and ugly).


Now, start unbolting your hard lines from the rest of the A/C system.


This hard line goes up and over the engine.  Remove the whole bracket from the radiator support.


With the top line removed, you will be able to focus your efforts on getting your NEW SERPENTINE BELT IN!  YAY!

The belt pictured below is a smaller belt than the stock belt.  I went this route versus buying idler pulleys to delete the A/C and power steering because:
  • I want to keep my power steering-- it makes it easier for me to control the car while cornering
  • Adding an idler pulley reduces drag caused by the compressor, but it still has more drag versus a smaller belt with less pulleys
  • The lower amount of ribs in the belt will also serve to decrease drag slightly and I am positively certain it will hold up.
    • Spaz of ClubRSX uses a smaller ribbed belt on his K24 motor with an Accord pulley and it is fine.
If you'd like to purchase the belt you can get it online for pretty cheap.  I paid around $20 for mine with shipping and handling.  The part number is: 537K6


To loop the belt around, you will follow the following configuration shown in the diagram stolen from ClubRSX:


This picture shows how the belt physicall wraps first around the alternator and then up and over the water pump.


One of the last things I did was plug up the A/C hard lines in case I wanted to ever have A/C in this car again.  I will probably be removing these lines soon, but I did not feel like it, so I just left them there.


Finally, your last step is to re-install the radiator and everything else.  Flush your coolant, fill the system with new coolant, burp the system, and take your whip for a drive!  Forgive the sideways picture!


I hope you all enjoyed this read.  It was fun for me to get back out there and work on my car for a small price of $20.  I will be letting you guys know about how the car feels after I finish doing the coolant!

Peace and thanks for reading!

Tuesday, January 21, 2014

Project DC5: Engine Builds for Dummies! Part 3


Welcome one, welcome all, back to another edition of "Engine Building for Dummies!"  If you missed any of my previous articles on Project DC5, go ahead and click the links below:


You know, it's tough-- being away from home.  It's humbling.

Being alone allows for time to realize one's faults.  Without family or friends as close as the ones back home to confide in it is possible for one to gain some serious insight into one's self.

You begin to see your faults, you begin to see your negative thoughts, you begin to see how all of those things affect you.

In a way, being away from home makes you more self-aware, in my opinion.  That's one of the things I've learned while out here-- that when you're alone, you have more time for introspection.  You have more time to think.  Sometimes it's good, but for the most part it's been pretty bad for me lately.  I miss my family.

Me by Lake Michigan in Chicago

However, I always remind myself of the positive outcomes of this event in my life.  For example, I am much more technically skilled now, especially in my career of chemical engineering.

For the most part, I have become an avid forum reader.  I frequent K20A.org every day to learn more about the K motor and what it is capable of, how to build one, what parts to use, what precautions to take, who to trust, who to talk to.  The journey of this motor build so far has been a journey in itself.


And I have learned so much more than all of these things.  I have learned how to gracefully handle myself around those more intelligent and wise than myself.  I have learned to shut my mouth when I need to and how to speak when I have to.  I have reaffirmed my belief that listening is more important than anything.  Because without listening, you can't learn.

This engine build somewhat embodies all of these learnings.  And so I am glad that I can share it with you, my readers on this blog...

Over the weekend, I had a lot of fun.  On Saturday night I went ice skating for the first time in a while.  I missed ice skating.  It reminded me of the days that I used to play ice hockey; doing cross-overs while turning, skating backwards like I was in the crease again, playing goalie, zooming down the ice like I was rushing to the bench or as if I were on a breakaway.  It made me wonder if I want to get back into hockey some day.  Maybe some day.

I also went snowboarding with my roommate.

We went to Cascade Mountain in Wisconsin, an attraction rated four stars on Google.  Although the slopes were a bit icy, we both shredded mad hard, tearing up the green circles, then the blue squares, and eventually the black diamonds.  This was my first time on the black diamond!  It was also my first time catching air off of a couple of jumps while snowboarding.  I couldn't have had more fun!

However now it's back to the work week and back to more engine building.  And I really can't complain about either.  My job is dope and this engine has been going slowly and smoothly.  I guess I just get down sometimes and I can't really help it.

If you remember in my last edition of "Engine Builds for Dummies" I finished removing the timing chain cover, and the tensioners along with the oil pan.

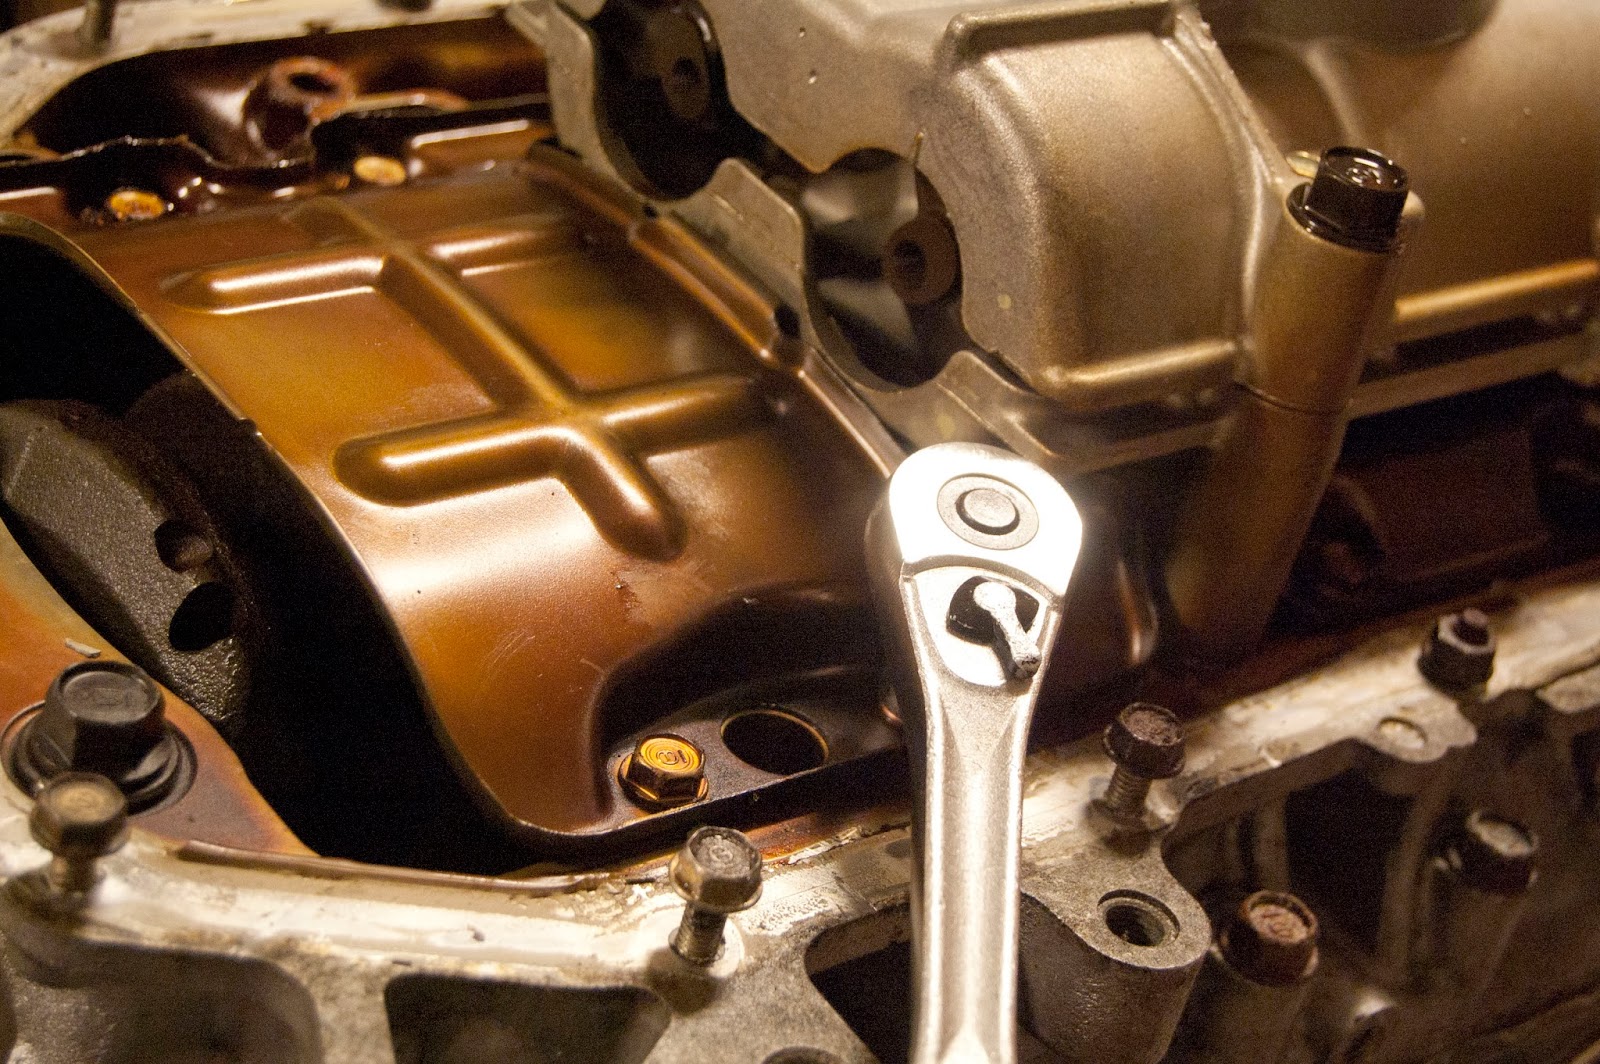
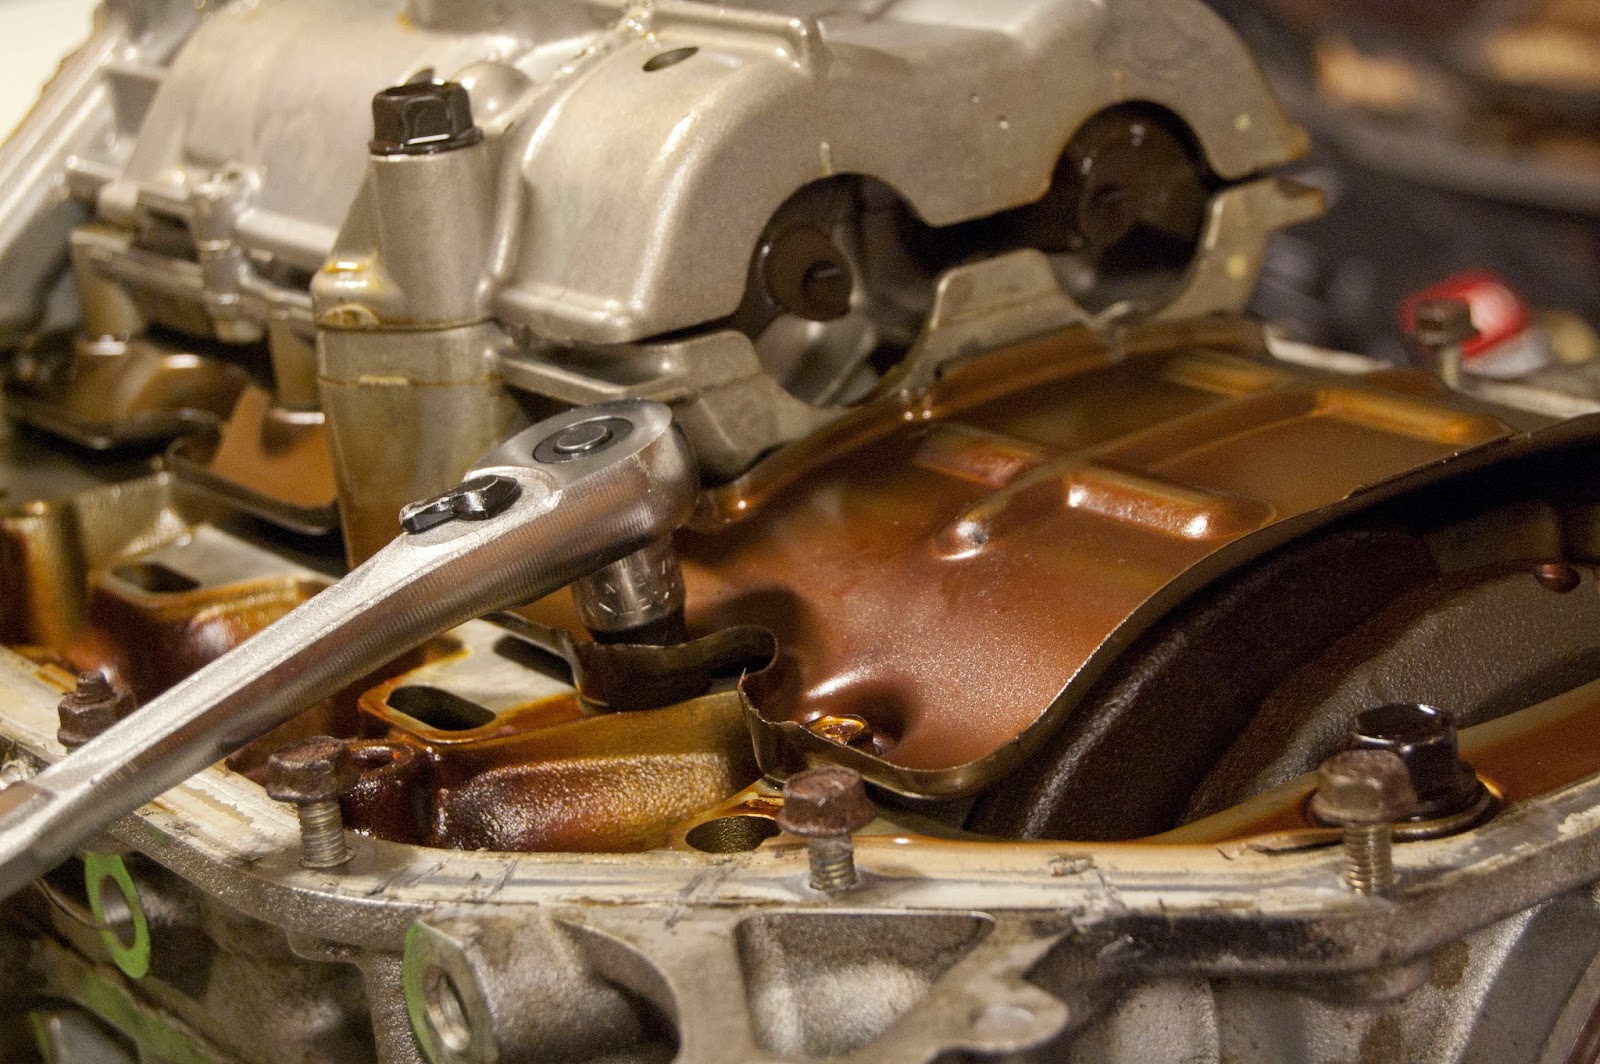
Well, here's the bottom end uncovered!  On top of the girdle sits some half baffles, or abbreviated windage trays that prevent oil from getting picked up into the rotating assembly, and a bulky K24A1 oil pump with heavy balance shafts included.


In theory, if the engine did experience some damage which made some metal shavings appear, then they would have appeared in the oil pan.  They would have also been apparent in the oil when I drained it.  However since there was little to no oil to drain from this motor, I figured another good place to check for large debris of any sort would be in the mesh inside of the oil pickup on the pump.  

Let's take a look at the clean pickup's mesh:


Next I removed the abbreviated windage tray.


 Finally, after removing the top four bolts on the back half of the abbreviated windage tray, you will see your first piece of crankshaft counterweight!  What a beauty!!!  Hahah


After I took off the half baffle, I began my work on the oil pump.  For starters, you're going to want to remove your tensioner.

I plan on switching to a K20A2 oil pump which has no balance shafts.  This will provide less rotating mass which will allow me to rev higher than on a K24A1 oil pump without cavitating the pump.  A couple of things are needed for this upgrade, including:

  • A 64-link Acura RSX Type-S oil pump chain (PN: 13441-PCX-004)
  • An RSX Type-S oil pump chain guide (PN: 13460-PNC-004)
  • A sealing bolt and washer to plug a hole in the girdle which would have supplied the K24A1 oil pump's balance shaft assembly if it were still bolted to the engine (PN: 90004-PE2-005 and 90401-PE2-003)
  • Bolts for the oil pump (PN: 95701-06025-08 and 95701-08050-08 and 95701-08075-08)
  • And the pump itself, of course (PN: 15100-PRB-A01)
Notice that the K20A2 tensioner is not needed for this mod because the K24 one will suffice.  That is why I will be saving this tensioner.  That's a good 60 dollars in my pocket :)


Here's the removed oil pump chain tensioner with its bolts.  I later put this in a bag with its bolts to make sure I didn't lose it.


Next I took an allen key and a cheater bar (a large copper pipe, lolz) and removed the K24 oil pump chain guide.  Supposedly this guide is too long to work with the K20A2 oil pump chain and oil pump assembly.  To fix this, an RSX Type-S oil pump guide will be needed.  Its part number is listed above.


Here is a pic of the tensioner on the left with its three hex bolts and the guide on the right with its two oddly shaped allen bolts:


I can't remember, but I believe there are four bolts holding the K24A1 oil pump onto the bottom end of this motor.  Proceed to remove the pump after you have removed all of the stuff holding it on...like the tensioner, guide, chain, sprocket, etc.


Looking at the pump, you can see the balance shafts.  They're just counter-weighted shafts that spin with the pump to offset vibrations.  Supposedly they're better for daily drivers, but honestly, most people don't think they make a huge difference.  So this is another reason why I care not for the K24 oil pump.


 After you've removed the pump, then you should be seeing something like this:


 ;)

Thanks for reading guys.  Until next time, you will just have to wait and see what the condition of the rest of this motor is in!

Peace.