So after weeks of working my butt off, I decided that I wanted to do a little upgrade to Arcie, my baby. The goal for the car is to be clean, functional, pretty, quick, and purposefully modified. In other words, I'm not going to slam my car or camber it to hell and if my car can't handle more power, I'm not going to put it on! My goal was to get more power, not by adding it, but by utilizing already existent power...
How does one do that?
By stiffening things up of course!
So, I wanted to stop my engine from wasting torque by moving in the engine bay, and transferring some of that torque to the ground. I could have installed mounts, but for the sake of adjustability and ease I went with this Ingalls Stiffy Torque Damper.
After I started installing it, everything was going great until I started rushing and this happened.
I over-torqued the stud on my strut tower -___-
Although my torque damper was firmly held in place by one other stud, and the broken stud still had some meat on it, I wouldn't just let it sit there, and I researched ways to begin fixing it.
I found out that I would have to remove my shock from the tower, unbolt it from the MacPherson Control Arm, and move it out of the way to punch out a press-fit stud! All of that work to fix a stupid mistake??
So after calling my buddy Eric up to help me weld in a new stud, I began moving the necessary components out of the way to get this bad girl fixed up! :)
The old stud was pretty stirdily press-fitted into that shock tower! But with the help of a drill, me and Eric were able to bang it out.
...And Viola! Check out that pesky torque damper that caused me all of this trouble. >:( (it wasn't my fault!!! JK I suck.)
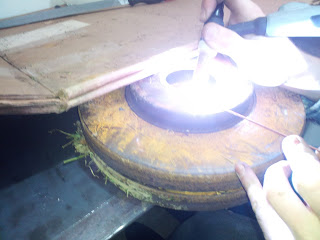
Then we headed out to the hardware store and picked up a simple bolt and washer to use as our stud. We took a welding table, two brake rotors, and we were able to get ourselves a good enough ground to tig weld a couple of tacks from the bolt onto the washer.
This kid really is a good welder, and he's done some pretty cool stuff. I've seen his beads on my buddy's cracked BMW Rim and they look grade A.
Then we disconnected the negative terminal of the battery, grounded the welder to the new stud after putting on the top bolt to hold it in place, and Eric got in some pretty tricky positions to get the job done.
Little aerial view for you helicopter-heads. CHYEAH.
With the stud finally welded to the underside of the shock tower i resprayed it with some enamel, and let it dry. Check out the heat-affected area on top.
There you go! A brand new stud, welded in all nice.
Stay tuned for more of Project DC5 on Lexi.Laron!


No comments:
Post a Comment
Comment